iOS动画和特效(三)MotionEffects
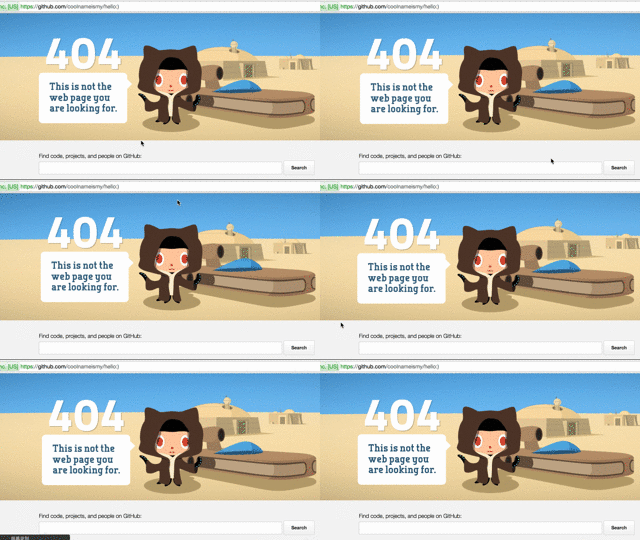
MotionEffects到底是个什么效果?我也描述不清楚,可以给大家看个效果
github的404页面,随着鼠标的移动,图片中octocat、飞船、房子都在一起移动。这是一个很友好的ue

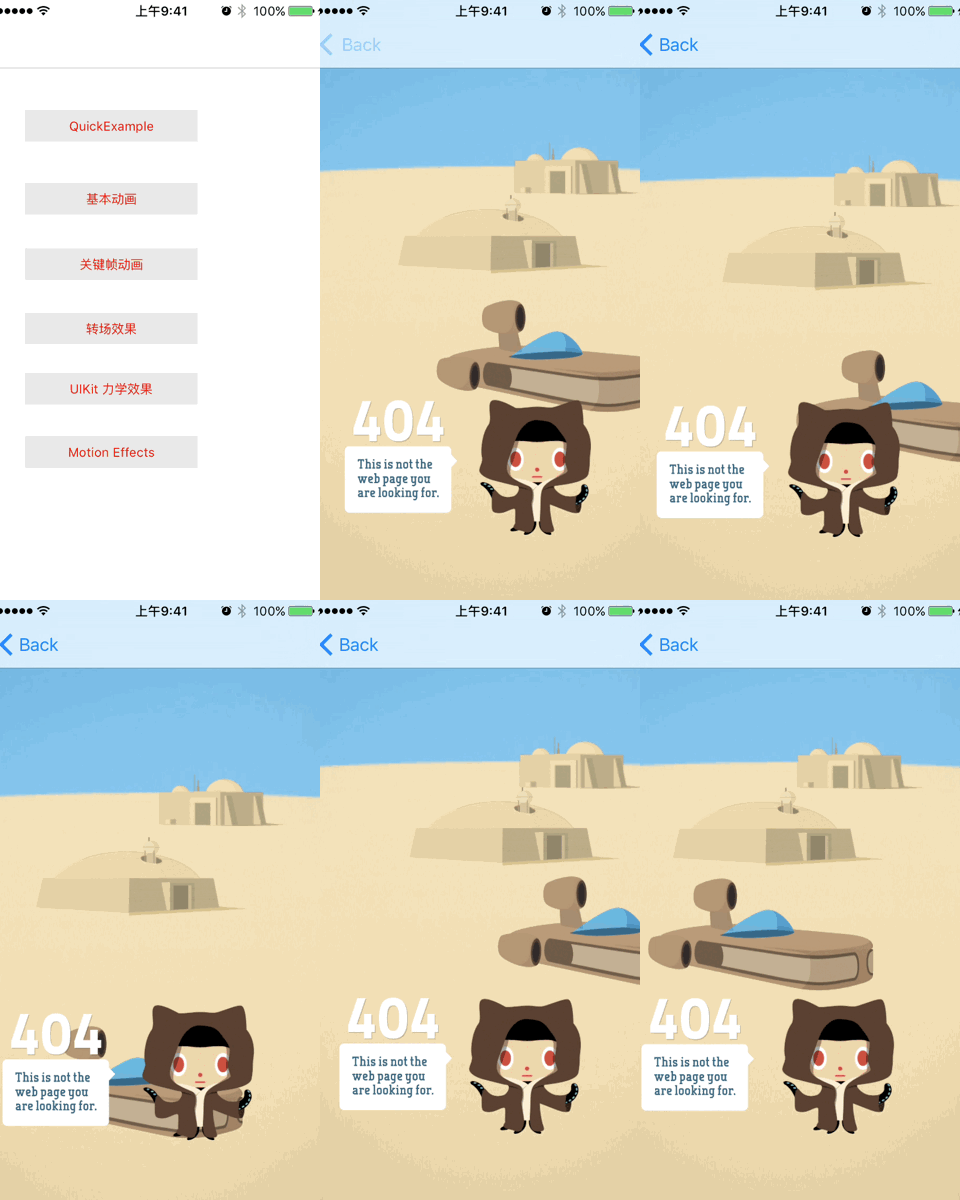
这个就是iOS中的MotionEffect,iOS在根据设备水平角度的改变,可以对应修改UIView的属性。我们的demo中,就在iOS手机上实现了这样一个效果。 (效果只能真机启动才能看到,模拟器无法得到水平仪的修改!)
完成后的demo效果

核心原理
UIInterpolatingMotionEffect 是 UIMotionEffect的一个子类,是具体的实现类,实现设备水平角度变化对UI元素的属性
     //添加Interpolation motion effect的工具方法
       func addInterpolatingMotionEffect(scope:Int,target:UIImageView){

           //初始化一个 水平方向的 UIInterpolatingMotionEffect
           let x_interpolation = UIInterpolatingMotionEffect(keyPath: "center.x", type:.TiltAlongHorizontalAxis)
           //最大最小值设置
           x_interpolation.minimumRelativeValue = -scope;
           x_interpolation.maximumRelativeValue = scope;

           //初始化一个 垂直方向的 UIInterpolatingMotionEffect
           let y_interpolation = UIInterpolatingMotionEffect(keyPath: "center.y", type:.TiltAlongVerticalAxis)
           //最大最小值设置
           y_interpolation.minimumRelativeValue = -scope/2;
           y_interpolation.maximumRelativeValue = scope/2;

           //建立一个MotionEffectGroup,并把水平和垂直两种效果
           let effectGroup =  UIMotionEffectGroup()
           effectGroup.motionEffects = [x_interpolation,y_interpolation]

           //将MotionEffe绑定到UI元素上
           target.addMotionEffect(effectGroup)

       }
ui元素绑定效果后,设备水平角度改变,就会对应修改keyPath的value,这里指定的keyPath是中心坐标的x位置,所以会水平移动。
iOS上完成github404页面的Effect
步骤1:画界面
    override func viewDidLoad() {
        super.viewDidLoad()

        vheight = view.frame.size.height
        vwidth = view.frame.size.width

        //步骤1:画界面
        scenery()
        //步骤2:设置motionEffect
        motionEffects()

    }

    //布置舞台
    func scenery(){
        //bg 背景
        bg = UIImageView(image: UIImage(named:"bg.jpeg"))
        sceneryElement(CGRect(x: -100, y: -100, width: vwidth+200, height: vheight+200), imageView: bg)

        //yurt 蒙古包
        yurt1 = UIImageView(image: UIImage(named: "yurt1"))
        yurt2 = UIImageView(image: UIImage(named: "yurt2"))
        sceneryElement(CGRect(x: vwidth-250, y: vheight/2-100, width: 200, height: 75), imageView: yurt1)
        sceneryElement(CGRect(x: vwidth-140, y: vheight/2-150, width: 120, height: 50), imageView: yurt2)

        //ship 飞船
        ship = UIImageView(image: UIImage(named:"ship"))
        sceneryElement(CGRect(x: vwidth/3, y: vheight/2, width: vwidth/3*2, height: vwidth/3), imageView: ship)

        //text 文字
        text = UIImageView(image: UIImage(named:"text"))
        sceneryElement(CGRect(x: 20, y: vheight/3*2, width: vwidth/3, height: vwidth/3), imageView: text)

        //octocat 章鱼猫
        octocat = UIImageView(image: UIImage(named:"octocat"))
        sceneryElement(CGRect(x: vwidth/2-vwidth/6+40  , y: vheight/3*2, width: vwidth/3, height: vwidth/3*1.2), imageView: octocat)
    }

    //初始化场景元素
    func sceneryElement(frame:CGRect, imageView:UIImageView){
        imageView.frame = frame
        view.addSubview(imageView)
    }
步骤2:设置motionEffect
    //motionEffects 效果
    //bg 背景 //yurt 蒙古包 //ship 飞船 //text 文字 //octocat 章鱼猫
    func motionEffects(){
        addInterpolatingMotionEffect(100, target: bg)
        addInterpolatingMotionEffect(120, target: yurt2)
        addInterpolatingMotionEffect(160, target: yurt1)
        addInterpolatingMotionEffect(480, target: ship)
        addInterpolatingMotionEffect(20, target: octocat)
        addInterpolatingMotionEffect(50, target: text)
    }


    //添加Interpolation motion effect的工具方法
    func addInterpolatingMotionEffect(scope:Int,target:UIImageView){

        //初始化一个 水平方向的 UIInterpolatingMotionEffect
        let x_interpolation = UIInterpolatingMotionEffect(keyPath: "center.x", type:.TiltAlongHorizontalAxis)
        //最大最小值设置
        x_interpolation.minimumRelativeValue = -scope;
        x_interpolation.maximumRelativeValue = scope;

        //初始化一个 垂直方向的 UIInterpolatingMotionEffect
        let y_interpolation = UIInterpolatingMotionEffect(keyPath: "center.y", type:.TiltAlongVerticalAxis)
        //最大最小值设置
        y_interpolation.minimumRelativeValue = -scope/2;
        y_interpolation.maximumRelativeValue = scope/2;

        //建立一个MotionEffectGroup,并把水平和垂直两种效果
        let effectGroup =  UIMotionEffectGroup()
        effectGroup.motionEffects = [x_interpolation,y_interpolation]

        //将MotionEffe绑定到UI元素上
        target.addMotionEffect(effectGroup)

    }
完成后的demo效果

自定义的MotionEffect
自定义MotionEffect通过自定义Class继承UIMotionEffect,并实现方法keyPathsAndRelativeValuesForViewerOffset来实现的
自定义MotionEffect类
public class MyMotionEffect:UIMotionEffect {
    override public func keyPathsAndRelativeValuesForViewerOffset(viewerOffset: UIOffset) -> [String : AnyObject]? {
        //打印设备水平角度
        NSLog("x:%f,y:%f", viewerOffset.horizontal,viewerOffset.vertical)
        //返回对象是一个字典类型,key是修改UIView的键路径,value是修改的值
        return ["center.y":fabs(viewerOffset.horizontal*1000)]

    }
}
使用MotionEffect
    myView = UIView(frame: CGRect(x: 0, y: 0, width: 300, height: 300))
    myView.backgroundColor = UIColor.redColor()
    view.addSubview(myView)

    myMotionEffect = MyMotionEffect()
    myView.addMotionEffect(myMotionEffect)
大家可以在demo中把注释去了查看效果。
    override func viewDidLoad() {
        super.viewDidLoad()

        vheight = view.frame.size.height
        vwidth = view.frame.size.width

        //布置舞台
        scenery()
        //motion effects
        motionEffects()

        //自定义的MotionEffect效果
        //addMyMotionEffect()

    }
感谢收看,如果对大家有帮助,请github上follow和star,本文发布在常立山的技术博客,转载请注明出处
